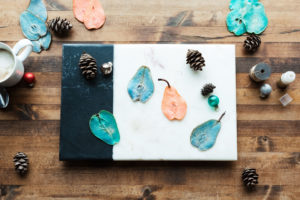
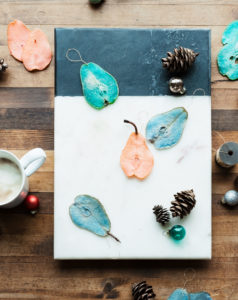
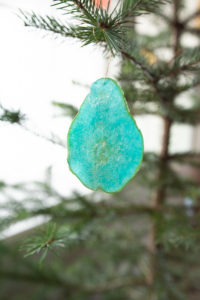
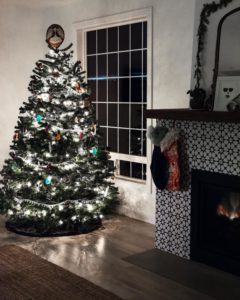
Last year, Eliza and I made a couple different kinds of ornaments together. Ones out of pine cones and painted bells. She had so much fun making them but then actually had more fun putting them on the tree. She was so proud to see our work displayed with the lights and the other glittering ornaments. It was so sweet and satisfying that I made a note to try to make it a tradition. And so this year, we set out to make our ornaments; ones that we would be proud to place on our tree. I looked around for some ideas but wasn’t finding anything that looked beautiful and sounded fun. With all of my citrus drying, my pinterest is full of dried fruit ideas, and that is when this idea showed up. I saw these beautifully colored dried pears that were used as cake decoration and I thought they would make the perfect sparkly Christmas ornaments. It only took us two batches to have them turn out beautifully, and now that I have learned a few tricks, they would be a cinch the first go around. I just love them and how they look on the tree!
What you will need
- Unripe pears (I tried a few varieties with the first batch and the bartletts are the best option)
- Food coloring or natural dyes
- Sugar
- Gold dust (if you want the sparkle)
Directions
- Thinly slice the pears. (a mandolin would work great but I don’t have one so I just used a sharp knife.)
- Make your simple syrup. Place 2 parts water to 1 part sugar in a saucepan. Stir in the sugar and bring to a boil.
- Add the food coloring. (Eliza’s favorite part) We used gel food coloring which is very concentrated and saturated. The first time around I added way too much and the pears ended up looking like colored beef jerky. Don’t make my mistake! The second time, I dipped a toothpick in the gel and then swished it around in the syrup. Worked great. Also, I wanted to do three colors so I had three saucepans going at once. 🙂
- Reduce the syrup to a simmer or rolling boil and add the pear slices.
- Simmer the pear slices in the syrup until they are translucent. VERY IMPORTANT! Also the first time, I didn’t let them cook long enough so they didn’t have the glassy effect, also leading to colorful pear beef jerky. You may have to add water to they syrup as they cook. I did and it was fine. Our stove cooks very hot and the water kept boiling out before they were translucent. We aren’t actually eating these (although you could) so we aren’t really worried about the syrup consistency.
- Once they are translucent, you can remove them from the heat and let them sit in the syrup for a bit. I only had them sit maybe an hour or two. If you are satisfied with the saturation of your colors then you can skip this step.
- Finally, set your oven to the lowest it can go, mine is 170 degrees F, and then place the pears on a non-stick baking sheet and let them dry out. Depending on the thickness, this should take anywhere from 2-6 hours.
- They are ready when if you try to pinch them together from the outsides, they don’t give, but the center is still a tad bit flexible. I let a few of mine dry too long and then they were very brittle and hard to work with.
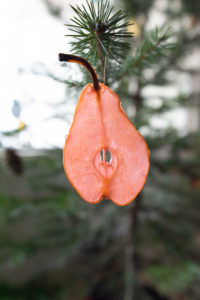
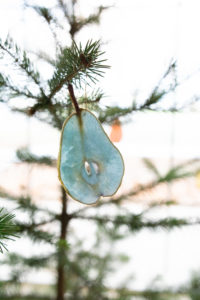
- Now to trim them! To attach the wire hangers, I used a needle to poke a hole and then just used gold floral wire to create the twist and loop. Using a needle and then just an ornament hook would work as well, I just thought the wire was prettier.
- Lastly, I bought some gold dust at Michaels that was in a handy dandy pump bottle and spritzed them with some fairy dust! I love the way they shimmer when you turn them or when the light catches them on the tree!
Important Tips
- Don’t put too much food coloring
- Cook the pears until translucent
- Don’t over-dry the pears, the get brittle
These babies might be the most beautiful things we have ever managed to craft around here. My mom, who is not one for the homemade look, said she would buy them so that is saying something! If you try them let me know! Merry Christmas!

+ ADD A COMMENT