Summer is in full swing, now in the middle of July. And we are deep into our lazy, long days of limited responsibilities, music travelling a bit too loudly through out the house, and not quite knowing what day it is. I am admittedly a fall and winter soul. I love the cozy, the warm drinks, the smells that fill the home, the gatherings that inevitably ensue. But this year, more than ever, I have welcomed summer and the ease that comes with it. I have a tendency, ok a perpetual habit of planning absolutely everything, of having to feel in control of the now and the future. I promised myself with the change of the season that I would plan less and try to be more present. I would worry less about where we are going and embrace gratitude for where we are at. I would constantly remind myself that there is very little that I can control and that is ok, even incredible. With the spring came a sense of renewal and the motivation I was looking for to learn to release the worry and anxiety. Now summer, it is still here. As is my penchant for planning. And sometimes I worry and have anxiety about the fact that I can’t seem to shake the worry and anxiety, BUT I am vastly lighter. My focus on thankfulness and releasing the fear seems to have paid off and, bonus, I seem to like myself more, knowing that it isn’t me who is controlling the world and all its evils, or our little world and all the mishaps and frustrations. This summer has brought wisdom and grace and contentment that I don’t think I have ever felt before, and for that I am thankful.
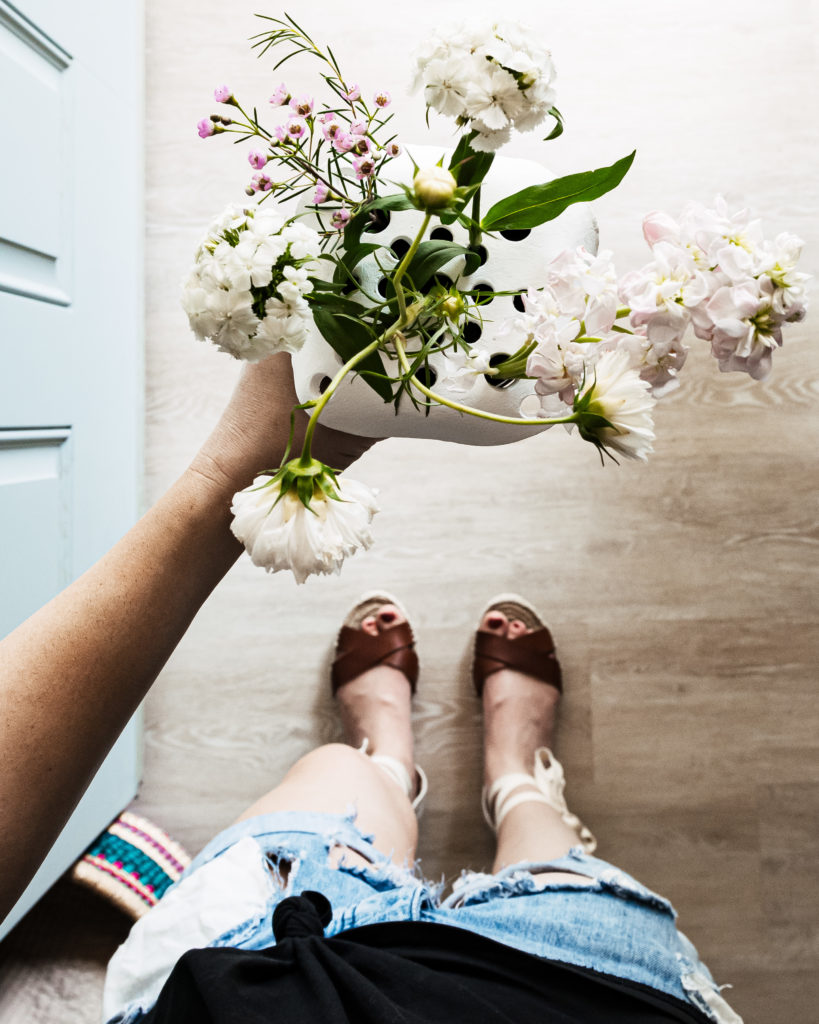
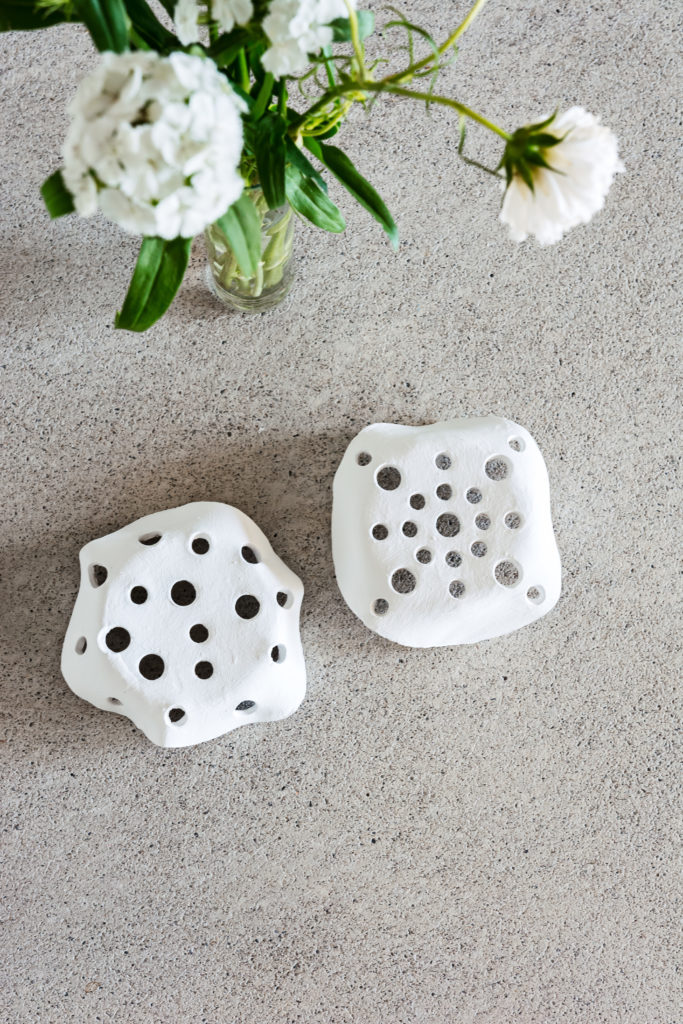
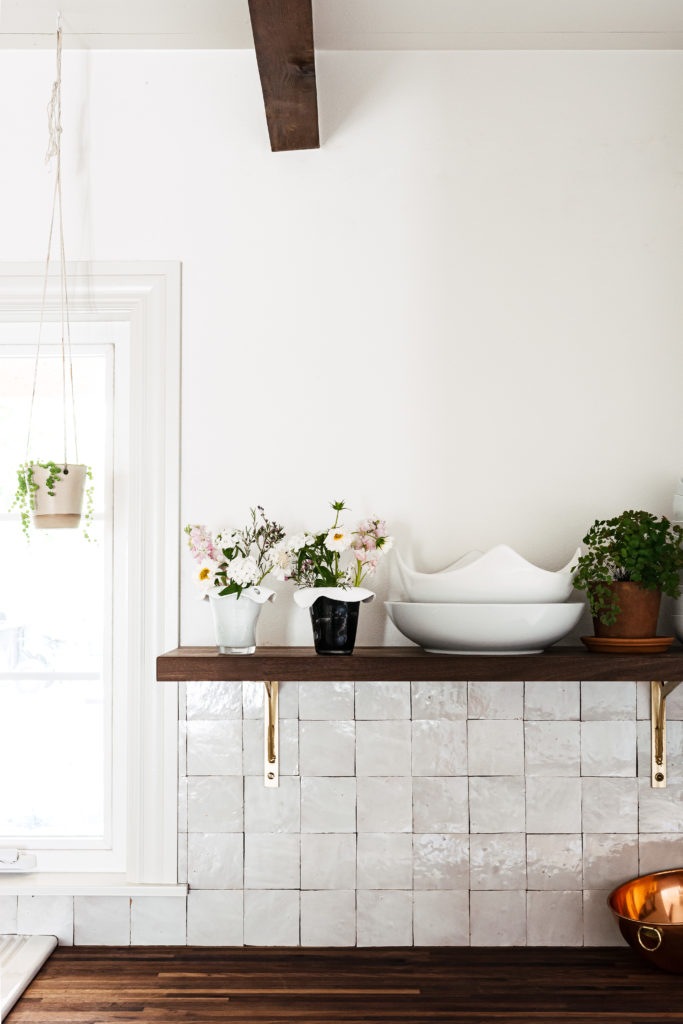
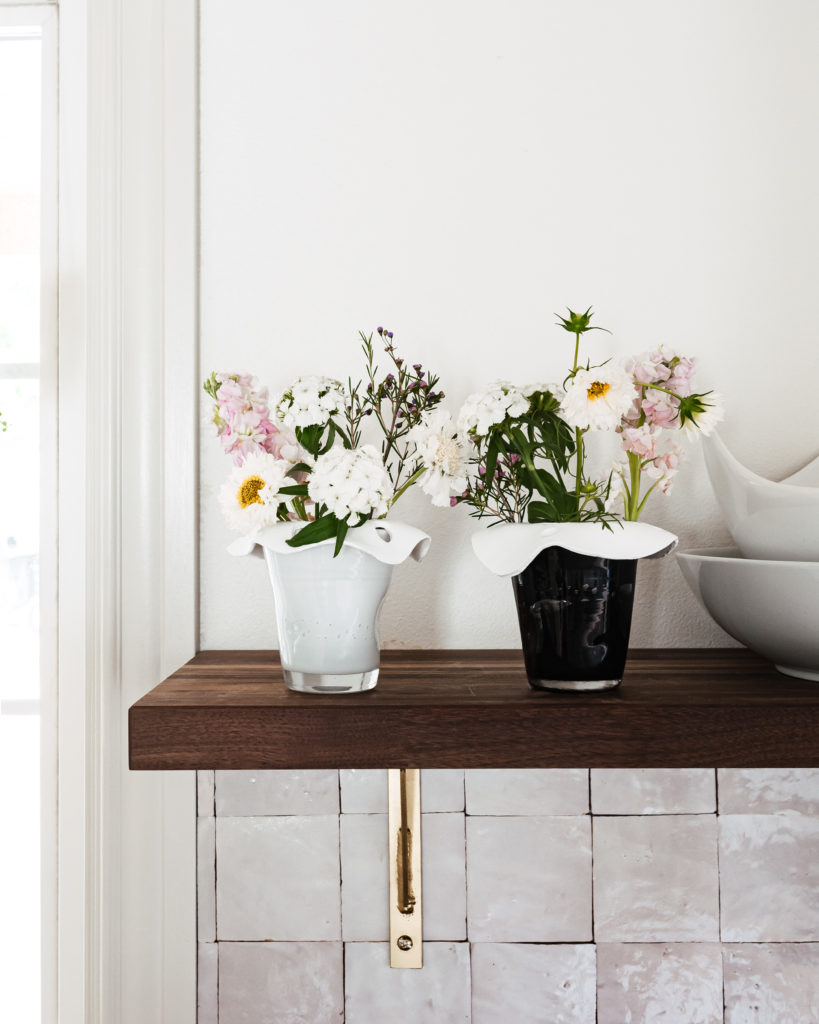
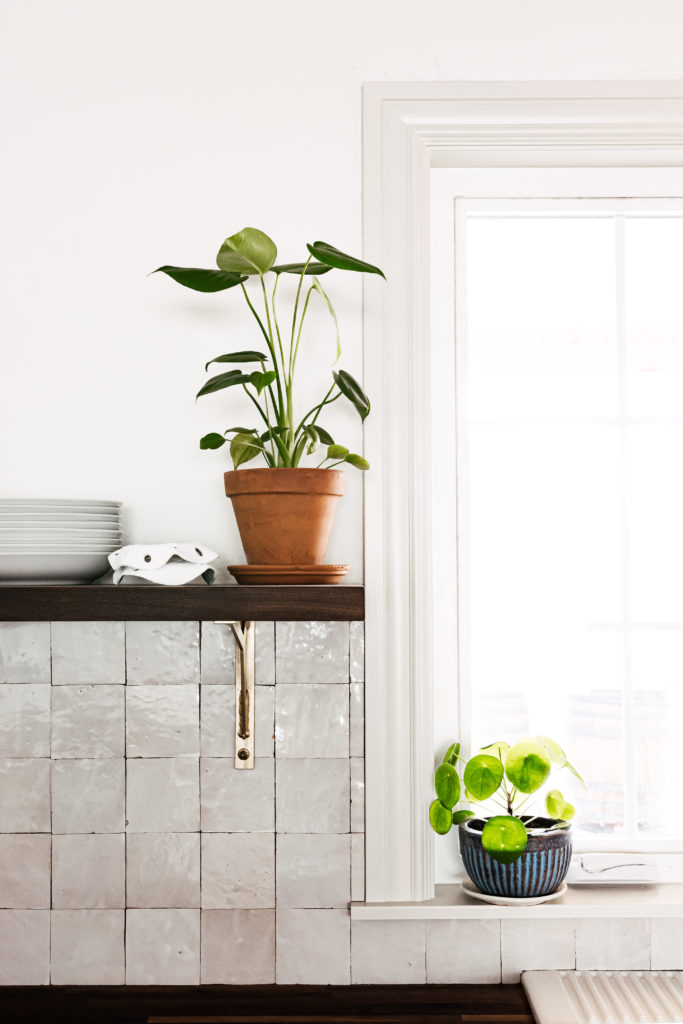
With summer’s slower pace and attempted calm, the season has ironically brought with it some very bustling times for our family. It is wedding season after all, and being the oldest in my family means that the younger crowd is hitting those wonderful wedding years. My brother was first down the aisle just a couple of weeks ago and now we are just weeks away from my cousin’s big day. We have had showers and rehearsals, dress fittings and dress mishaps, filling our days for the last few months. All of these occasions have also meant lots of leftovers, both the food kind and the flower kind, my favorite of the leftover category. Nothing says summer like a house full of blooms, and nothing makes me happier than passing through a room, seeing and smelling fresh flowers propped on a shelf. As the flowers wilt and shed their petals, I am constantly picking though them, combining the longer lasting stems into fewer and fewer vessels. Until finally, I am left with just a few, fresh enough to display, but not wanting to give up on them just yet. This pattern led me to find a solution to the “last few blooms” problem. I stumbled across a sweet little vase topper on pinterest and I decided to try to re-create it. After a few attempts, and some quick education on air dry clay, I have a couple of these sweet toppers that are just beautiful to me and also serve their purpose incredibly well. They were simple enough to make that I just might be giving them as gifts for the foreseeable future. Hopefully this little project will have your hands covered in clay and your home filled with summer’s most beautiful flowers!
Materials
- air dry clay (mine is called “white” but is actually sort of a light gray)
- parchment paper
- rolling pin
- pen or marker caps (a couple of different sizes)
- tin foil
- drinking glass or vase
- acrylic paint (if you want)
Instructions
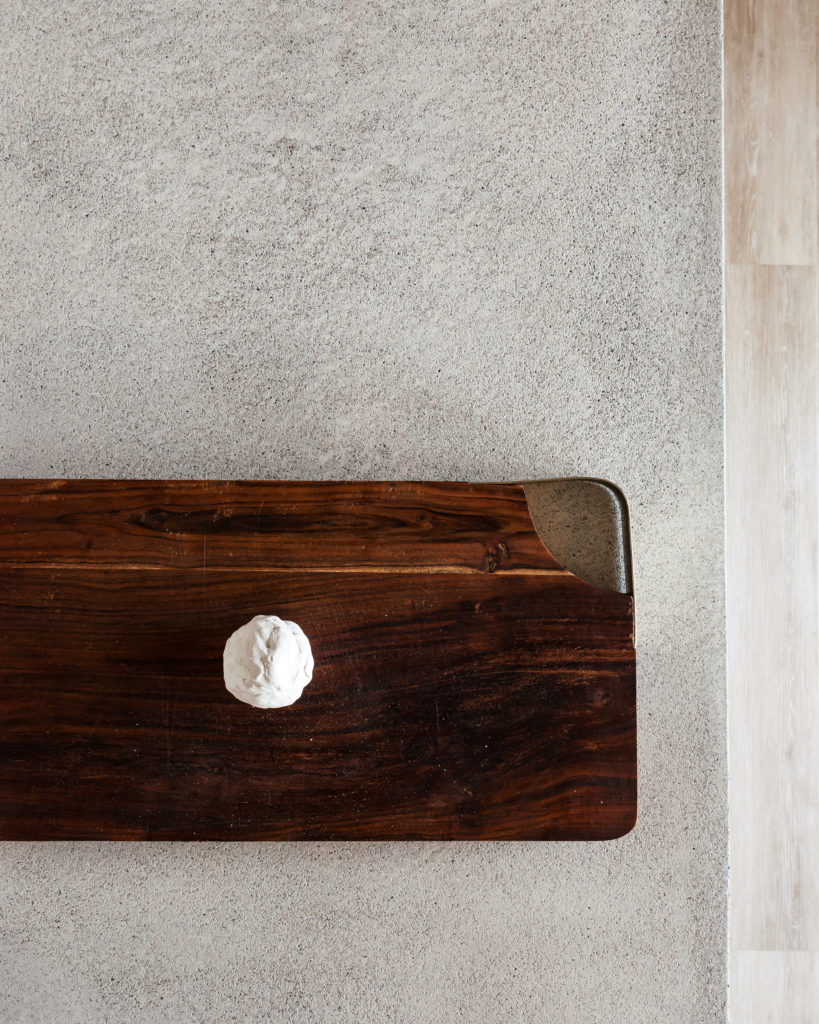
- Begin by working with a ball of clay about the size of a baseball or a bit smaller. Soften it in your hands and add a bit of water too it if it is not workable enough.
- Flatten the ball in your hands and place it on the parchment paper.
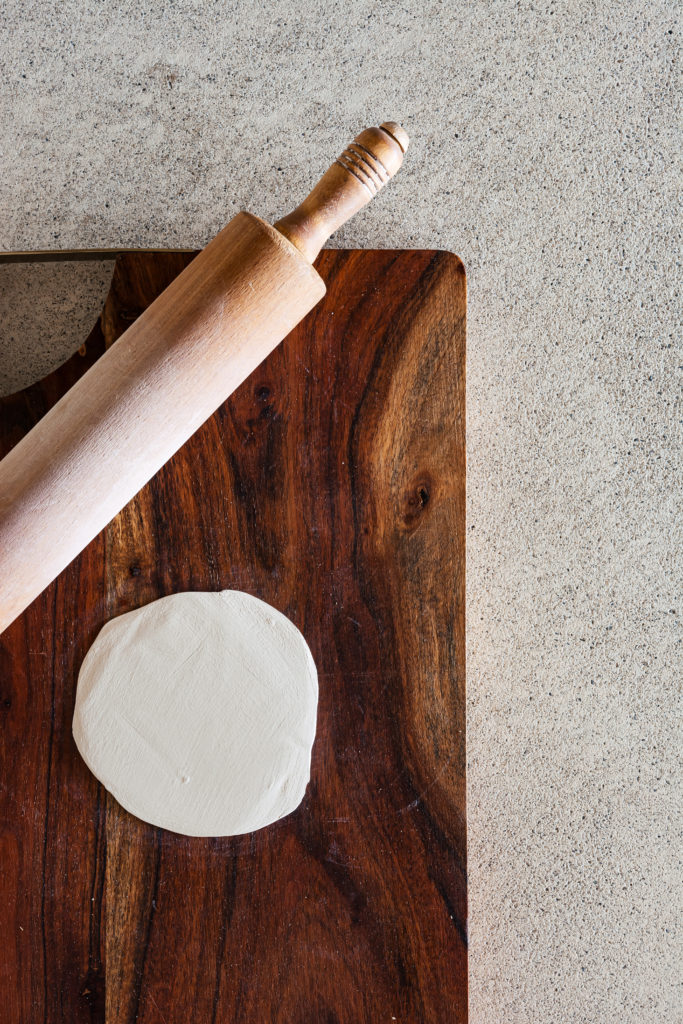
- Roll out the clay with your rolling pin until it is 1/8to 1/4 of an inch thick. The closer it is to 1/4, the less chance you will have of it cracking while it is drying.
- Once it is flat and somewhat uniform. Place your glass top side down onto the clay to make sure that the circle is large enough. You want about an inch and a half to two inches around the glass for your overhang.
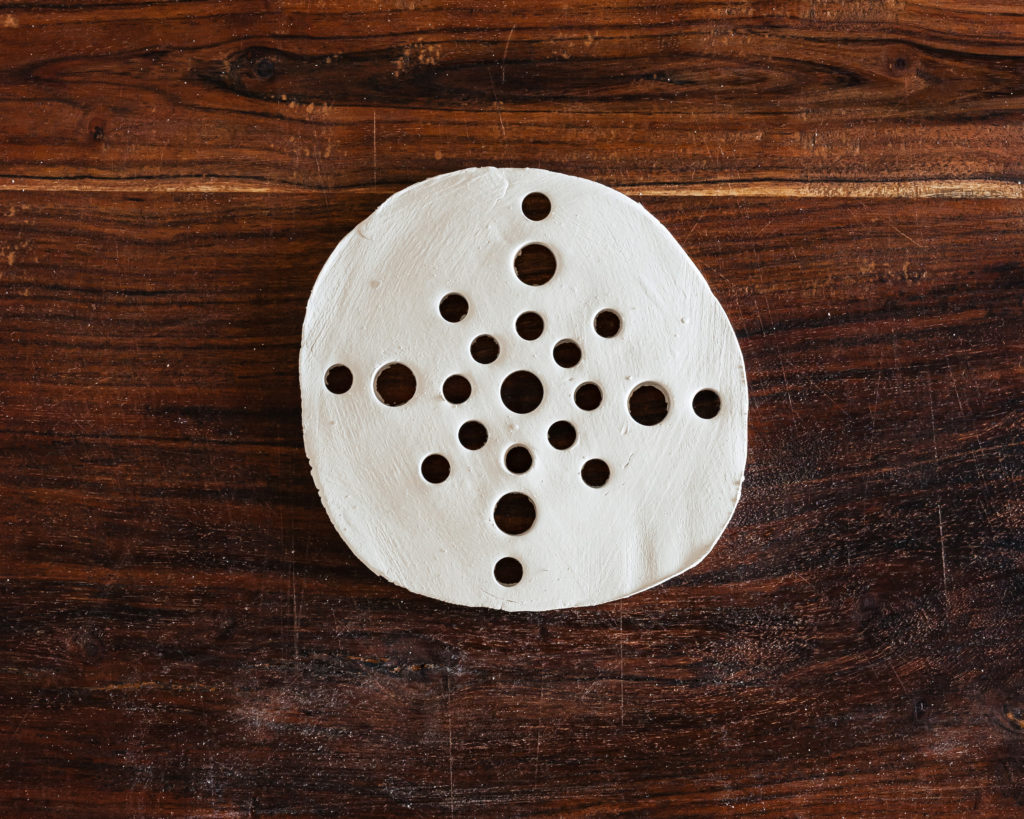
- Trim the edges of the claw with a knife. It doesn’t have to be an exact circle, I like them when they are a bit misshapen but make sure that you are happy with the shape before proceeding.
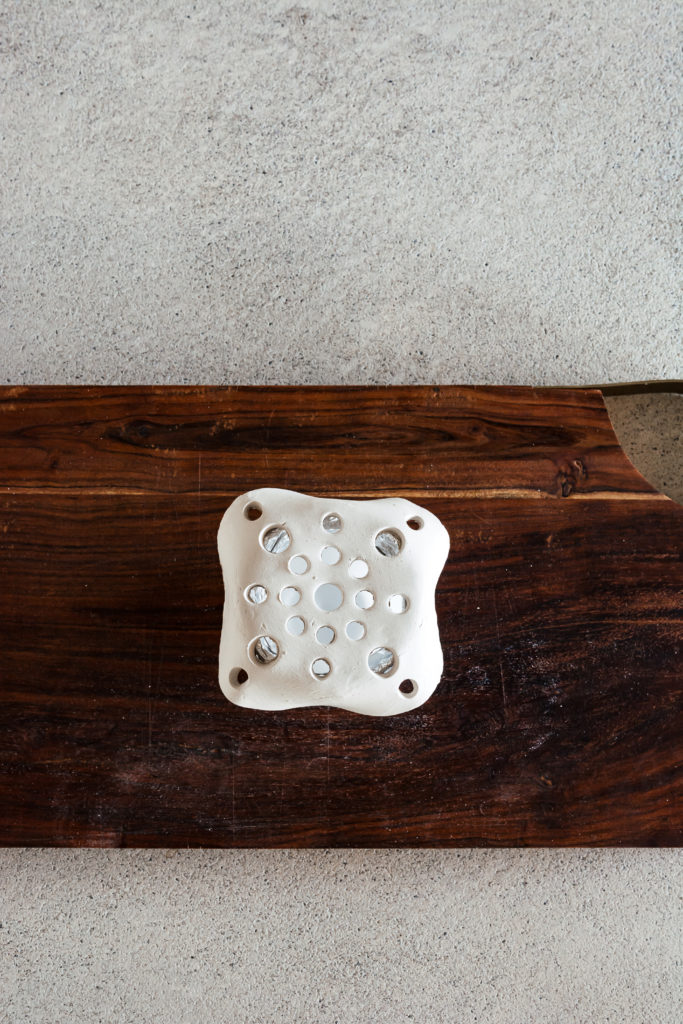
- Use the marker caps to press holes into the clay. Use a small knife or a toothpick to clean the caps after each hole. You can do random holes throughout the clay or make a pattern. I did both and I love both of them.
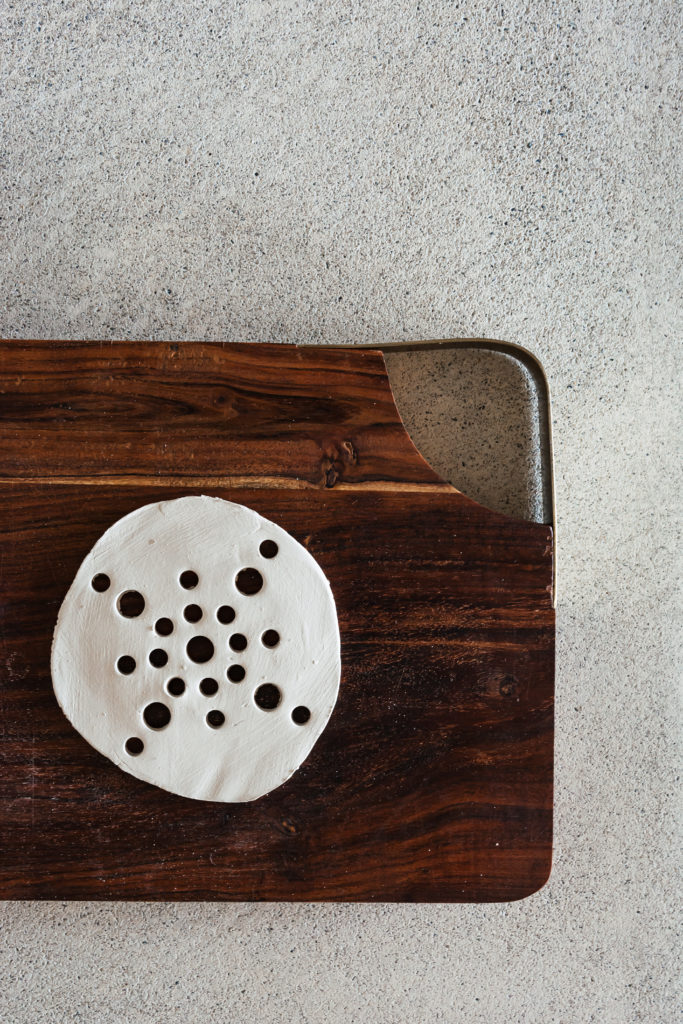
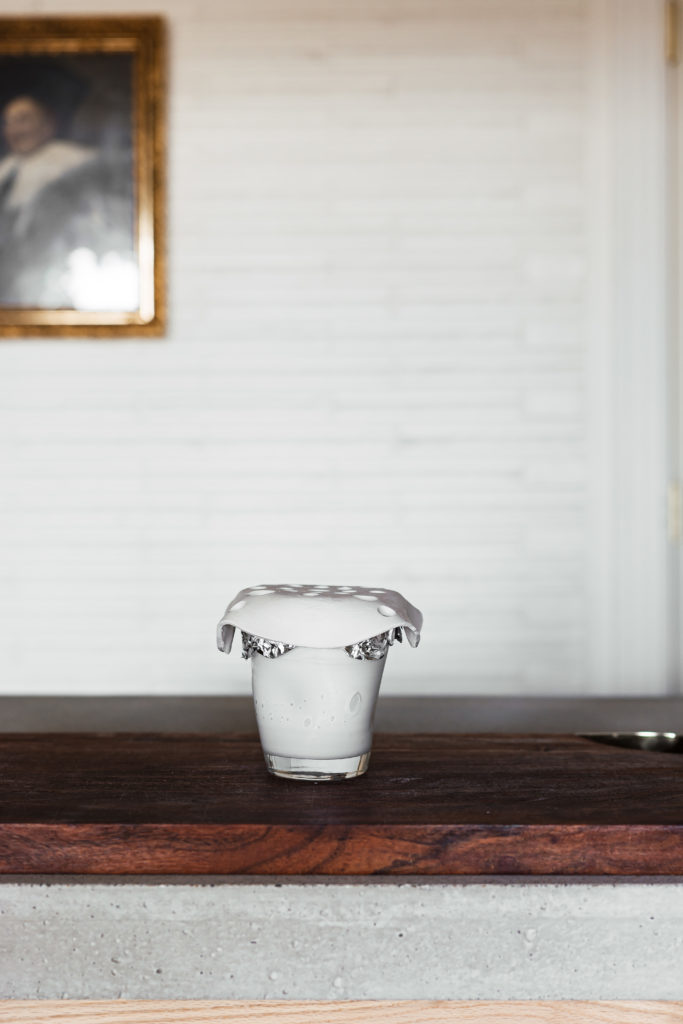
- Once you have your holes cut out, line the edge of your cup with tin foil and place the clay on top of the glass. Gently fold down the edges of the clay around the glass.
- Leave it to dry for 24 to 48 hours.
- Paint with acrylic paint if you would like
- Enjoy with fresh blooms!
For more seasonal projects check out “A Spring Scent” and “Dogwood Winter Herbal Tea.”

+ ADD A COMMENT